Let’s Encrypt SSL is the only service that provides digital certificates for free. Let me rephrase that.
Let’s Encrypt is the only service that I trust that provides SSL certificates for free. That in itself is great. In this How To guide, I will transform my own non SSL secure site to SSL secured without spending a dime.
Why is an SSL certificate necessary?
SSL certificates authenticate the ownership of a public key by the named certifying authority. It simple terms it shows that the website having it is actually owned by the owners mentioned in the certificate. This helps in preventing scams and access to phishing sites. It is very easy to check the authenticity of a SSL certificate.

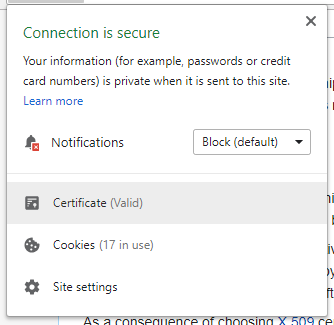
Click on the green lock icon that says ‘Secure’. In the modal window you will see that the Certificate is shown as ‘Valid’. You can even check in detail. Click on the Certificate tab.
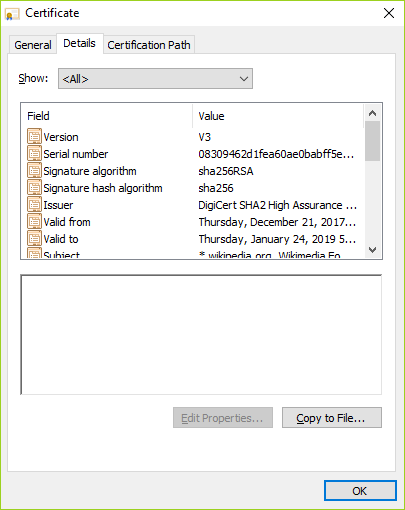
Check the other tabs for the other options. You can try this for any up to date modern browser.
The OTHER reason why I suggest you (and I) get this is because it helps in our Google Rankings. I know it may not be totally fair, but Google prioritizes websites that have a SSL certificate installed.
For a data driven analysis, check this page by Neil here. It clearly shows how much having an SSL certificate alone can help and how many websites currently use it today.
So why not get an SSL certificate?
The simple method is to buy an SSL certificate from your website.

But that costs much more than they are worth. Besides, what’s the fun in getting a single click SSL in the first place? You don’t get to learn anything about how to get the work done anyway.
How to get Let’s Encrypt SSL Certificate
This is my objective. This is the site I am talking about (and my inspiration for this post).

Currently my site does not have a certificate installed. By the time you are reading this, hopefully it will be certified. So here is the screenshot as of now.

So now let’s follow the steps herein. For the original Let’s Encrypt website, here is the link.
The Get Started post here shows that it recommends using CertBot to get the job done. CertBot itself is actually authorized by Let’s Encrypt. So we are good.
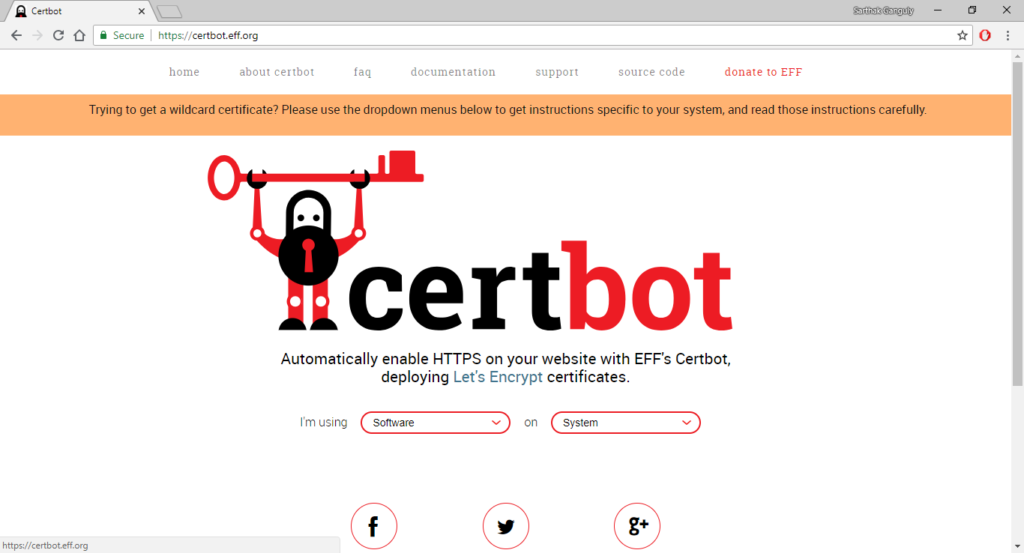
Here is the problem.
What do you select for ‘Software’ and ‘System’?
Things get a little bit tricky here. If you have some technical knowledge try the following steps.
Steps to find out the Software and System assuming you have a hosting solution
- Open the CPanel Admin of your hosting solution.
- If you have phpMyAdmin or MySQL databases installed with Linux hosting, you are most probably on Apache.
- So Software = Apache.
- This is what I am going ahead with.

Select the appropriate option from the list boxes - Web Hosting Service will not get me anything useful. So let’s find out our operating system of the server.
- Login to your account using SSH.

Simply ssh to your web server using your preferred client - Run the following command cat /proc/version
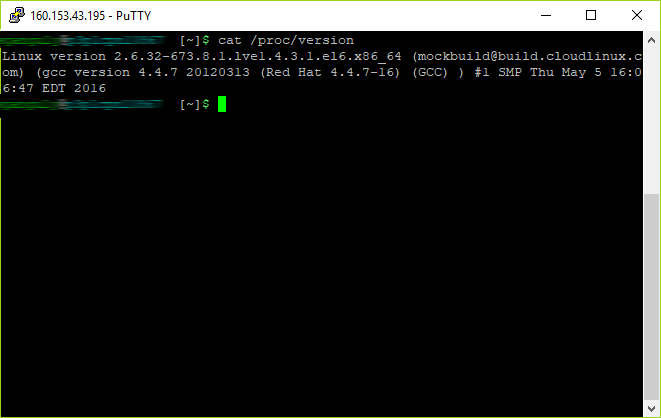
You can check your server operating system by this command - So, for me the operating system of the server is a Red Hat derivative.
- There is no Red Hat 4.4 version available in the list of operating systems. I choose this ‘Other UNIX’

Select the RHEL option or the other Linux option - Download certbot auto installer script and change permission to ‘a+x’
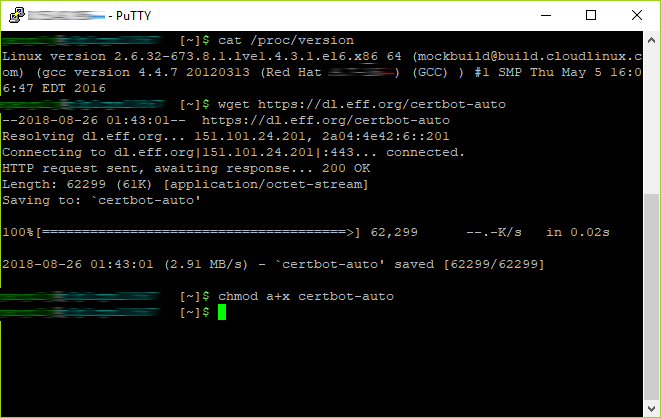
changing permission of the executable using putty - I ran into a major issue here.
- Apparently, my shared server does not allow me to use the super user command. Fair enough.

It is a pity that the admin rights are not enabled for my account. Check if yours is.
I have to try something else now. Please let me know in the comments section if you can get it done via the ssh terminal itself.
Let’s Encrypt provides multiple options to get this done using several compatible clients that it lists in its own page itself.
I have chosen ZeroSSL. I have found most users try this out. If this works, I can go ahead and try other alternatives.
How to install Let’s Encrypt for my website using ZeroSSL
Problem is that I cannot install anything on my server and execute it from there. So I have the cloud option available to me only. The biggest downside to this is that I won’t be able to auto renew my certificate automatically every three months.
But let’s continue.
- Click on the Free SSL Certificate wizard to get started. Enter both your website names here. This should include any subdomain that you may have.Note: CSR is Certificate Signing Request. If you are here doing this for the first time, go ahead assuming that you don’t have one.

Enter both domain name, including your canonical name. For subdomains, you have to do separately. - It will generate the CSR for you. This may take some time. I download the CSR. I will need it later for verification. Click Next to continue.

Generate the CSR on Zero SSL - The account key is going to be created now. Wait for sometime for this to be created.Download the Account key as well.

Accept the Let’s Encrypt service agreement and download the key and the CSR - Click Next.Now is the time when I need to verify both the keys. Download both the files here. I will upload them to the path needed.

Download the files and put them in the locations specified in your webserver - Upload the two files to the public html directory/.well-known/acme-challenge of your server

Upload the files to the appropriate location using your File Manager - Go back to the ZeroSSL page and click on the links created. If you have done all right, you should open pages like this one below.Otherwise, retry the previous step.

Clicking on the link should fetch you the result as shown on the ZeroSSL page - Your certificate is now ready. You only have to install it. Keep your CSR and account keys safe. That means every 90 days you will only have to do the previous Step to create a new certificate only. If you lose your CSR and account key, you will have to start from Step 1 again.

Your free Let’s Encrypt SSL certificate is ready to be deployed - Now visit the SSL/TLS page to install your certificate.
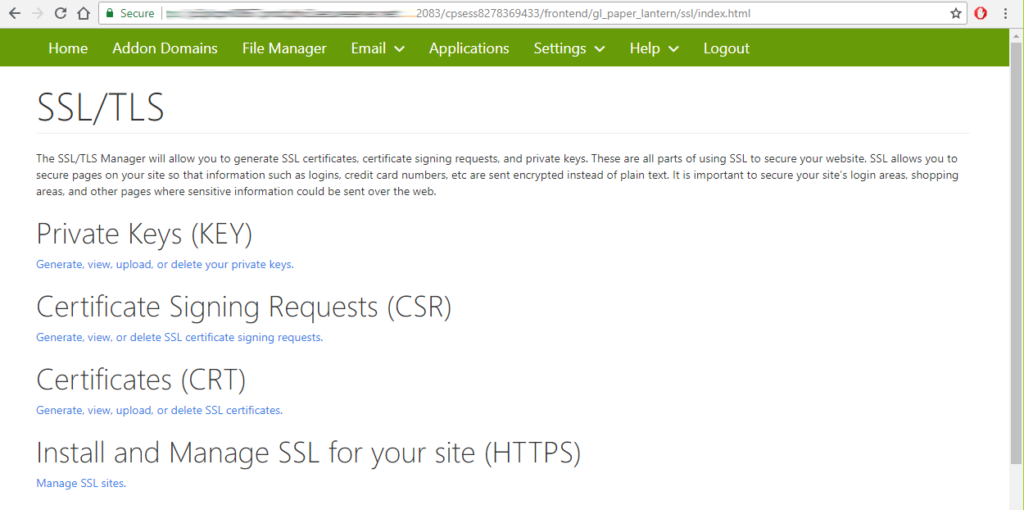
Install your SSL by clicking on the the ‘Install and Manage…’ link - Click on ‘Install and Manage SSL for your site (HTTPS)Copy the first into the CRT. Then look for the first ‘END CERTIFICATE’ text in it. Cut from that to the end and paste in the Certificate Authority Bundle box.
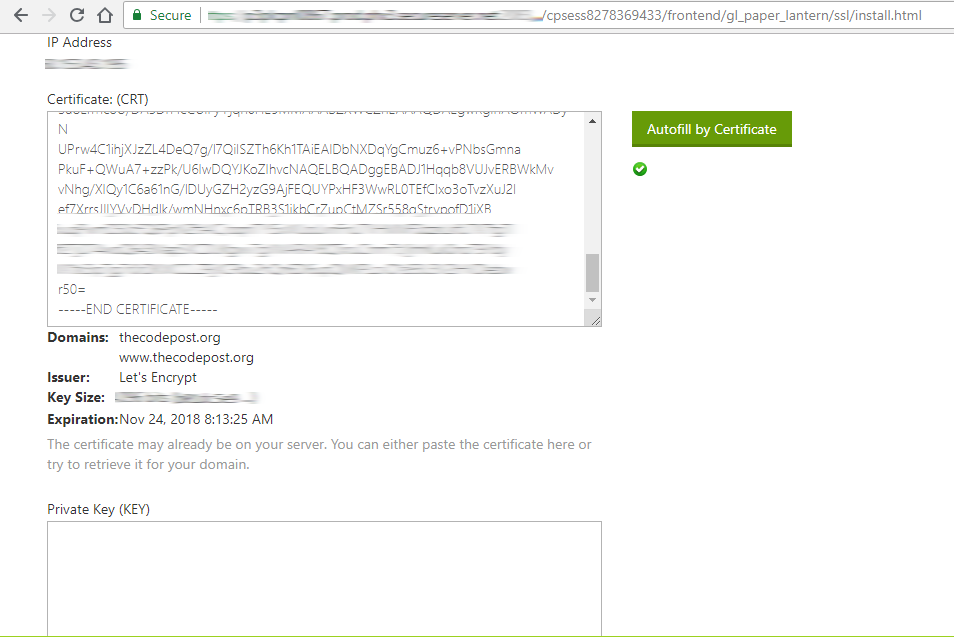
Simply paste the copied strings from ZeroSSL to your GoDaddy (or other hosting provider) account’s SSL management console 
Copy and paste the Certificate Authority Bundle and a green tick should show up on the right - Now copy the private key. Then paste it in the Private key window. Now check if there are green check marks on the side for all the boxes. If all is well, click on the Install Certificate Button.

Insert the certificate private key for your Let’s Encrypt SSL 
Installation of Let’s Encrypt SSL on your website is now complete
Certificate is installed. Keep in mind that this will renew every 90 days. So I will have to set a Google Calender reminder to do this every 3 months manually.
How did it turn out
Wait a moment folks!
There are 4 things you need to do to make sure things went well.
Last 3 Steps to use Let’s Encrypt SSL on your website
- Upload and check the following in your .htaccess file
<IfModule mod_rewrite.c> RewriteEngine On RewriteBase / RewriteCond %{HTTPS} !=on RewriteRule ^ https://%{HTTP_HOST}%{REQUEST_URI} [L,R=301] # BEGIN WordPress RewriteRule ^index\.php$ - [L] RewriteCond %{REQUEST_FILENAME} !-f RewriteCond %{REQUEST_FILENAME} !-d RewriteRule . /index.php [L] </IfModule> - Go to your WordPress General settings and change your baseurl. Change both the urls from http to https.
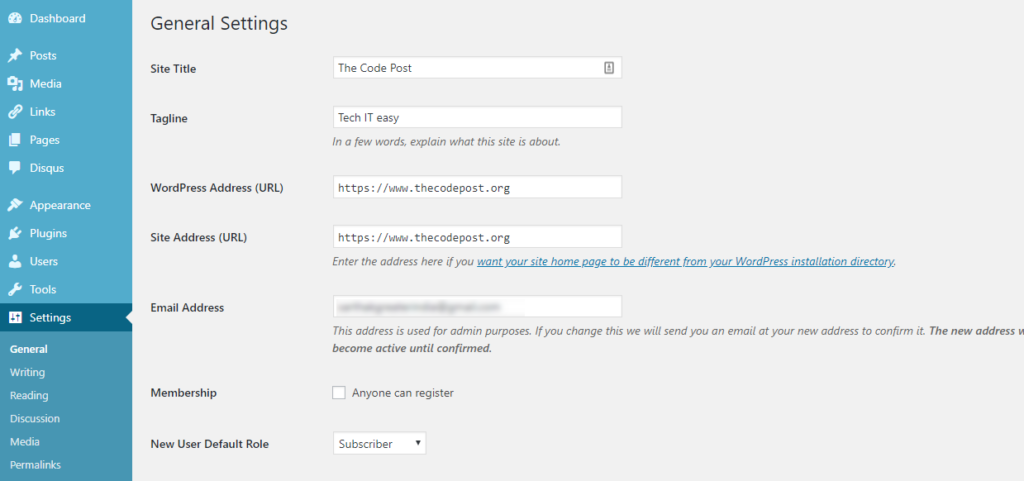
Change the base urls of both to https - In the database (usually MySQL and accessible via PhpMyAdmin) you need to change the post content from http to https. This may not be necessary if it is set to relative url. I recommend using Better Search and Replace plugin to get this done. Recheck everything later (and backup manually) on phpMyAdmin just to be safe.
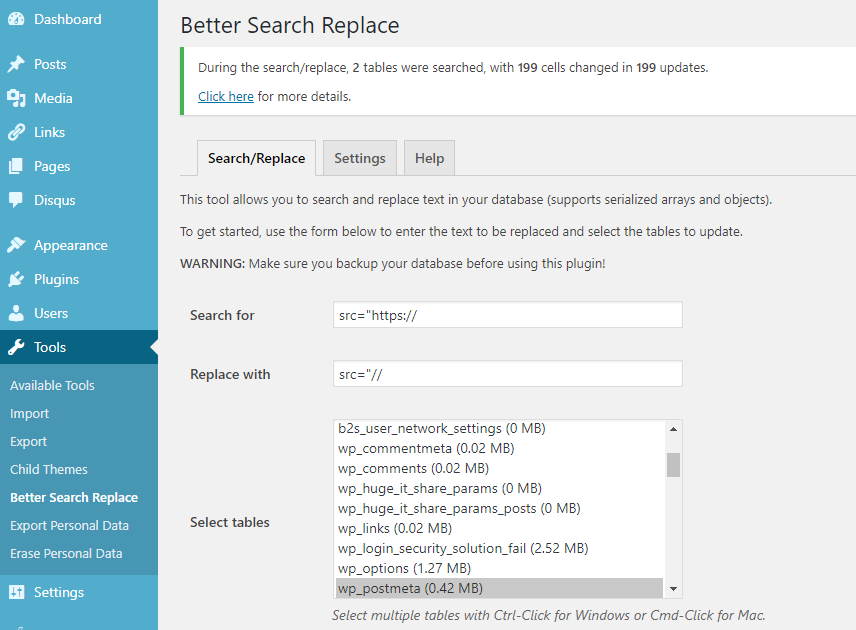
Use Better Search replace to replace the http links in your database without messing with the database directly - If you are using srcset attributes, there is a chance that your images may still want to load from http instead of https. Load up your theme’s functions.php and add these lines such that it looks like this below.
function ssl_srcset( $sources ) {
  foreach ( $sources as &$source ) {
    $source['url'] = set_url_scheme( $source['url'], 'https' );
  }
  return $sources;
}
add_filter( 'wp_calculate_image_srcset', 'ssl_srcset' );
Update the file and you are done.
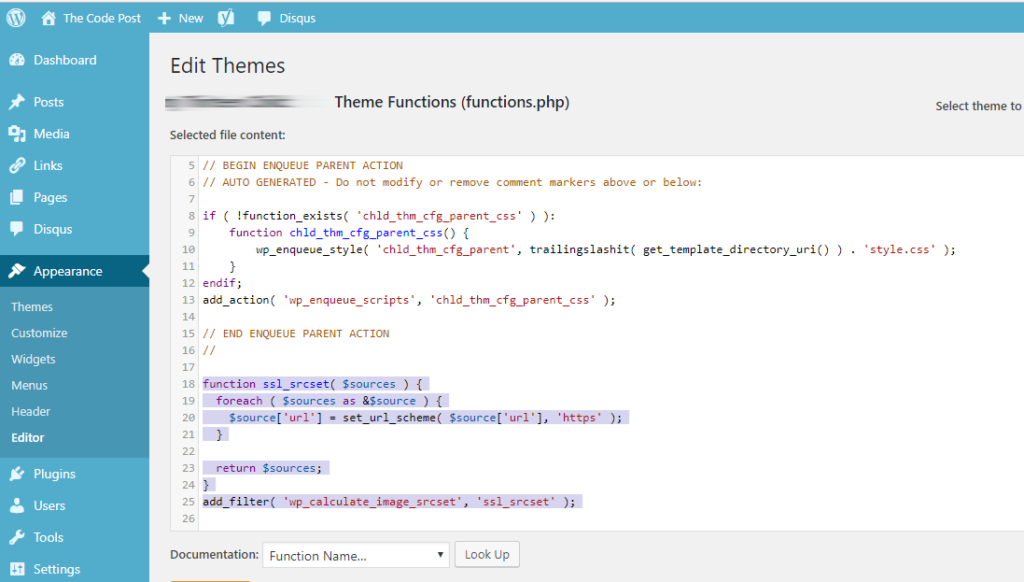
Edit the theme functions.php and enter the code as mentioned herein
Time for results
You should have a beautiful Secure Lock icon showing in the address bar (as mine is showing already!)

In case something does not work, let me know in the comments below and I will do my best to resolve them.
Thanks and keep sharing.
