A simple Google search shows how many results are there if you want to ‘build static websites‘.
If you carefully notice, you will find static site generators fill up most of the search results. In many cases, all you may actually require is an HTML boilerplate to get started with.

However, I understand the need for a more functional website. The ability to add new pages, posts and media can get very cumbersome if you are dealing with the HTML, CSS and JS files directly. This brings us to HTML static website generators.

Currently, there are plenty of them out there.
- Three useful tools to build static websites
- Why build static websites at all?
- Getting started with Hugo (in 7 minutes)
- Hugo Installation – (1 min)
- Verifying installation (~0 mins)
- Creating a new site (1 min)
- Create new posts (2 mins)
- Run your static website (1 min)
- Customising the setup (2 mins)
- Creating a Product Promo static website with Hugo (~7 mins)
- Build static websites using Web Slides theme in 7 minutes
- Creating a profile based static website in 7 minutes
- Build Static Websites SuperFast with Publii in 5 minutes
Three useful tools to build static websites
I have personally used three of them so far. These are –
- Jekyll
- hugo
- Publii
Jekyll is a personal favorite and I have used it in the past for some of my GitHub pages. The greatest advantage in this case is the custom theme support. You will require some amount of programming knowledge to set this up for the first time though. I will require a separate post to cover this in detail. Since the objective here is to setup sites very quickly, I will not go this route.
I will be covering the next two.
First comes hugo. This is similar but is nowhere near as popular as Jekyll. But setting this up is easier. On the flip side, the number of themes available for this is limited. But what exists should cover most of your requirements. It takes really only a couple of minutes to get started and another 5 at most to make the basic changes to make your site your own.
The other I will cover is Publii. This is also a static site generator. The difference is that it includes an installer that outputs the files as you require. This is the simplest method you have to create websites of your own without coding and paying anything. Theme support is minimal, but if you want to get started with the basic requirements in place (SEO, about pages, posts etc.) you can’t go wrong with Publii.
Why build static websites at all?
This is an age of dynamic web pages.
Everywhere you look, you will find PHP, its frameworks or even ASP ruling the webspace.
For large sites with a lot of dynamic content that makes a lot of sense. But does it make sense to a photographer? Or a poet?
Probably not.
Think about it.
A dynamic website first processes the webcontent in the server site and then that outputs the content to be delivered to the end user. This requires the use of a database to be used for generating content. All major Content Management Systems use databases for this purpose.
Static websites however can deliver the files (HTML, stylesheets and JavaScript) as is – without processing in any server.
Must Read: How to speed up your WordPress website – simple actionable tips that work
The advantages of static websites are many –
- You depend way less on the servers in the first place. This removes the chance of increased load on the remote servers affecting your uptime. The server only has to fetch the resources requested by the end user. There is virtually no processing involved. It scales ridiculously well.
- Security issues won’t bother you. Security loopholes exist because there are complex applications running on various ports on the server. These applications have vulnerabilities that are exploited. If the only thing the server does is fetch HTTPs traffic – there is nothing to actually hack. Sure, someone may be able to deface the site. All you have to do is make sure your FTP passwords are stronger to prevent this. And restore a backup in the worst case. There is no patch management required, no scans are necessary either.
- Static websites are much much faster and cheaper. Since you won’t need the server to process information, it speeds up content delivery. You can get much more done with a basic shared server than you would have needed with WordPress running in all its glory.
Getting started with Hugo (in 7 minutes)
Hugo claims itself to be the fastest framework to build static websites. That may be true. But it is true for only those who know how to code. Some prior knowledge on web technologies and the terminal is needed to make it work.
But that said, it is really simple and intuitive. And boy it is fast.
For now, I will show you how I created a few websites very quickly.
Hugo Installation – (1 min)
The installation procedure is ridiculously simple.
You can follow the steps on their page for a detailed guide about how to go about. They offer a number of options.
For the Mac user, you have an option to install it directly using brew.
brew install hugo
If you are on Windows, follow the below steps.
- Go to hugo releases page
- Find out the relevant Windows download package – check if your system is 32 bit or 64 bit. You can easily do this by going to Start – Settings – System – About. Under System Type you will be able to find out if you are running the 32 or 64 bit version of Windows.
- Download the file and unzip the contents. You will find an executable starting with hugo. You can use this itself to build static websites.
- Now you need to setup the environmental variables – otherwise you won’t be able to access the hugo executable from any other directory.
For the Linux users, things are way easier.
For Ubuntu, you can use apt-get install hugo to do the job.
If you use other distributions, you may check the official guide.
Verifying installation (~0 mins)
You can check the hugo version to ensure that the application is installed properly.
hugo version

Creating a new site (1 min)
Creating a new website is extremely simple with hugo.
Just type in the following command.
hugo start new hugotest
This creates a new website folder structure named hugotest.
Next you have to create a theme. A theme is what gives structure to a site in hugo.
Head over to the hugo themes site and choose one that you like. I have taken ‘Ananke’ for the first demonstration.


It is highly recommended to follow the instructions given in each of the theme installation pages. One simple trick that applies to all of them is this –
- Enter the theme directory
- You will find a sub folder called examplesite or something similar. Enter this folder as well.
- Copy the contents – all sub folders and files.
- Return to the root hugotest (site) directory and paste the files and folders.
- Merge or replace as requested. If you are doing this on production servers (which you must not), take backups. This is save you a lot of time replicating the exact site structure and custom features of each theme. The example site structure gives you a good starting point to begin with.
- Do a hugo serve to check if there are any errors. If there are, it is usually due to the fact that the theme name and location is not found in the proper place. Check the ‘Customising the setup’ section below to troubleshoot it.
- You are set.
Create new posts (2 mins)
You can create new pages or posts simply by using the below commands –
hugo new posts/hello-world.md

This creates a new post with the slug hello-world. Note that this is a markdown file ending with a md extension. Editing Markdown files is simple and a good markdown cheat sheet like this should cover your needs. When you compile the files, hugo generates HTML files from this content.
Also note the folder structure of the new file. It will be available at yoursite/posts/hello-world.
If you want a root level page or post, all you need to do is use the following –
hugo new about.md
This creates a new About page.
In any case, when a new post or page is created, it will show you the path. Open the markdown file with any text editor of your choice and you will see something like this.

See that the draft: true exists. That prevents it from being published. Make changes you need to the file and either delete the draft statement or change true to false.
Run your static website (1 min)
Head over to the terminal and just enter
hugo serve
By default your website will be locally hosted at localhost:1313. Open the link and it should look something like this below.


Click on the post and it should open as expected. Check the url structure.

To add another post, repeat the process by opening a new terminal window. You don’t need to do a hugo serve again unless you close the previous one. Changes to the site structure are compiled in real time and served.

If you don’t see the changes, do a hard refresh (press Ctrl + F5) and you should see your changes.

If you still don’t, remember to turn the draft flag to false for the new page/post.
Customising the setup (2 mins)
The easiest method to proceed with this theme is to create new posts and pages. There are plenty of setup options that you will find in the config.toml file.
While serving the site, you may run into errors.
You can easily solve them by noting down the changes below.
Open the config file – they will be either of config.toml or yaml files.

Check these two values –

theme = "ananke"
themesDir = "./themes"
Make sure the name of the theme is exactly the same as the name of the folder and the theme directory is the same as above (by default). Anything else, and you may run into issues.

The rest of the options are very self explanatory. You should experiment with them and check what suits you best. Ananke is a very basic theme and there are not many things you can change. Customising the theme by coding itself is beyond the scope of this post. So let us try a few other themes as well.
Creating a Product Promo static website with Hugo (~7 mins)
We will follow the steps as before, only that this theme is a little more feature rich and not as blog like.
Start a new site with hugo new site productpromo

Download the theme as shown below. I am using the hugo-fresh theme for this setup.
Go to the productpromo directory
Go to themes and git clone the theme directly.

git clone https://github.com/StefMa/hugo-fresh.git
Just head over to the themes directory and open hugo-fresh folder. Copy all the contents and merge it with the root of productpromo.
Now curl the config file from github pages, if you wish to.

curl -O https://raw.githubusercontent.com/StefMa/hugo-fresh/master/exampleSite/config.yaml

Now just do a hugo serve or hugo server to serve the file to your browser.

You site should be up and running.
Now let’s create another one using the web slides theme.
Build static websites using Web Slides theme in 7 minutes
Create a new hugo site using the same hugo new site slides command.
Then enter the site folder and git clone the theme using the below command.

git clone https://github.com/rcjach/hugo-webslides.git themes/hugo-webslides
Now copy the contents of the theme folder to the parent folder such that it asks for the replacement of the default site files.
That should do it.
Now open the config.toml file and edit the two params as below.
theme = “hugo-webslides”
themesDir = “./themes”

go to themes folder and enter the example site 
hugo webslides config file 
example contents of webslites theme example folder
This should allow the theme to load perfectly.
For editing the content, go to the content directory and open the _index.md file. Customise this file to generate content in the front end. Hugo serve to check it live.


Creating a profile based static website in 7 minutes
You should probably now be quite proficient in building hugo websites.
In case you run into issues, they have a pretty active community that will be happy to help you out.
Or, you can also directly let me know in the comments below and I will get back to you.
Create a new hugo site using the hugo new site profile command.

Go to the themes directory and download the following theme using git clone command.
git clone https://github.com/nurlansu/hugo-sustain.git

Then go into the theme folder and copy the contents of the examplesite and paste them to your profile directory.
Merge and replace any files it asks you to.

replace files and folders 
copy theme files and replace existing ones in root site directory
The page should open like this.

Yeah. Chris Turner.
You can change everything, of course.
Go to profile – data and open the projects.yml file to edit the projects page.

The blog posts can be found in profile – content – blog.

The profile image can be found profile – static – img.
The basic content file is config.toml. Customise the same to see the changes on the home page.

After I make the most basic changes, it looks like this.

Pushing these to the webserver can be done in a number of ways. A simple way to keep the files synced and up to date is using git. Check this post for the deployment guidelines.
Build Static Websites SuperFast with Publii in 5 minutes
I came across Publii after looking deeper into search results for ‘build static websites’. That was not surprising.
What was unbelievable was the fact that this application was free. And it is also open source.
If you are a open source web developer, I will highly recommend using Publii.
Download Publii from their website or check out their repo on Github.
Benefits of using Publii for building static websites
There are several advantages for using Publii, even if you are an experienced web developer.
It does all of these below out of the box and saves you so much time.
- It is portable. It is not on the cloud. You have to install an application and then deploy the website you create locally. This allows you to develop even without an Internet connection.
- There are a decent number of themes available. Some of these are paid, but the majority are not. Making themes on Publii is also super simple. For this though you need to have coding skills.
- For the absolute beginner, you get an interface that is simpler than WordPress. You get a rich text editor like the one on WordPress as well. It even allows for importing your WordPress blog over to Publii.
- SEO is built in to Publii. So you don’t have to manually configure everything.
- You get to directly push your website to a host of servers like Github pages, Google Cloud, Gitlab, Netlify etc. There is no need for any other third party application to sync files.
- There are a number of minor features tucked in their themes – like GDPR cookie notifications, lazy load and many others. Do try them out.
Once you install Publii, creating posts is super simple.

Go to Posts and click on ‘Add New Post’.

The theme options are numerous and it should cover most if not all your requirements. Want additional CSS styles to add? There are CSS classes you can append as well.

How to preview your Publii site?
Just click on the ‘Preview your changes’ button and the site will open locally on your system.

How it looks – bits and features of Publii
Even enabling AMP is just a click away.


modifying menu options in Publii 
generate open graph tags from Publii dashboard itself 
GPDR support is inbuilt 
website speed settings in Publii
The Marketplace is the place where you can get themes. A few of their themes are paid while the rest are not. The customisation options are immense, so you can play around with the free themes and add features.

Installing a theme is also super easy. Just download the theme and drag the downloaded file to the Themes area and it will be imported for you to activate.


Here I create a basic page with a couple of picture that I had lying around.


It is ridiculously easy.
If you are an absolute beginner and wish to spend no money on web development, go for Publii without a second thought. Give it a try and see if works for you. Even if you don’t actually create a production ready website, you can use this for creating your design prototypes.
Pushing it to a webserver
Okay.
You go to Server, enter the domain details where you wish to publish it – test the connection and save your settings.

This was too easy.
In fact, I will make a note to introduce this to students learning how websites actually work. Pushing live websites cannot be easier – especially considering it is so feature rich.
Publishing to Server
Go to Server settings. You can test all of the features. For simplicity, I will be using the Manual Upload feature because that allows you to upload your files virtually anywhere!
Enter the details. Select the output type depending on the type of the server. I will be using Netlify (without using the Netlify direct upload feature). So I have gone for ZIP archive.
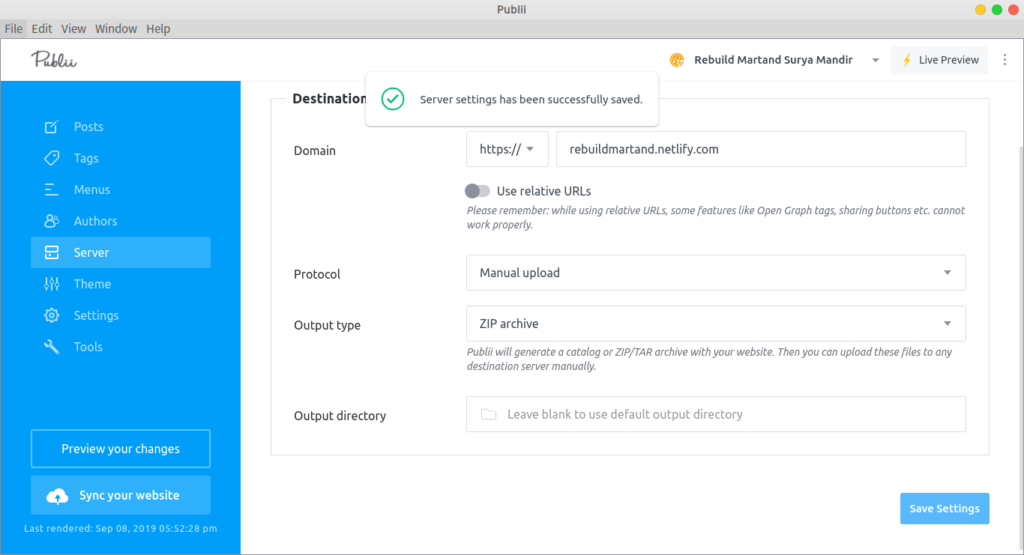
Now just click on ‘Prepared to Upload’ button on the bottom left panel.
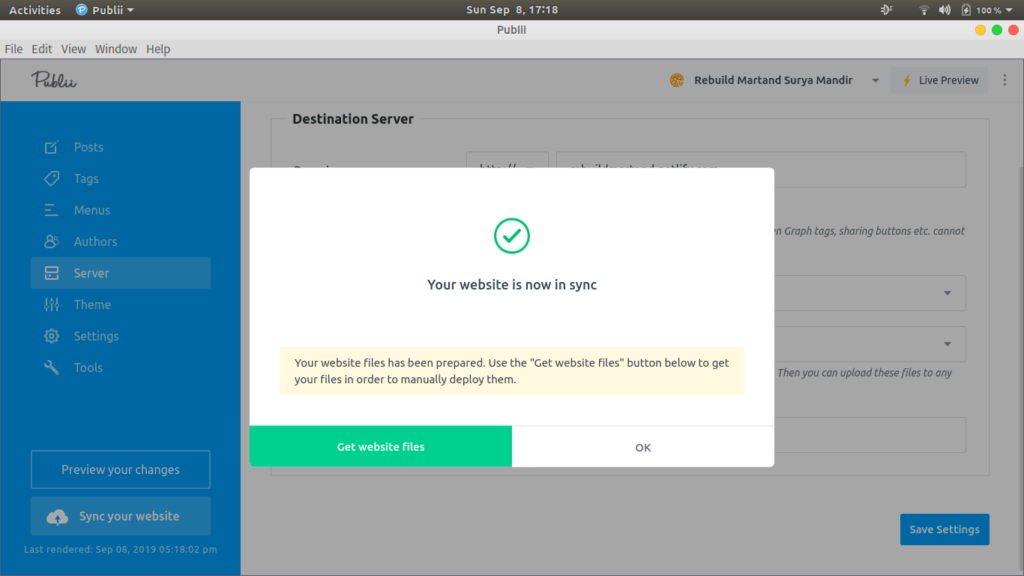
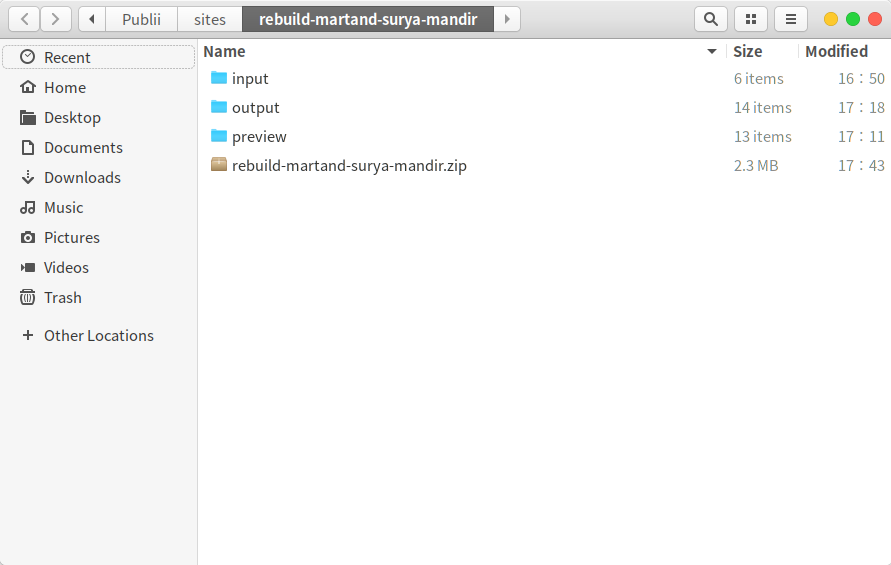
You will get a ZIP archive.
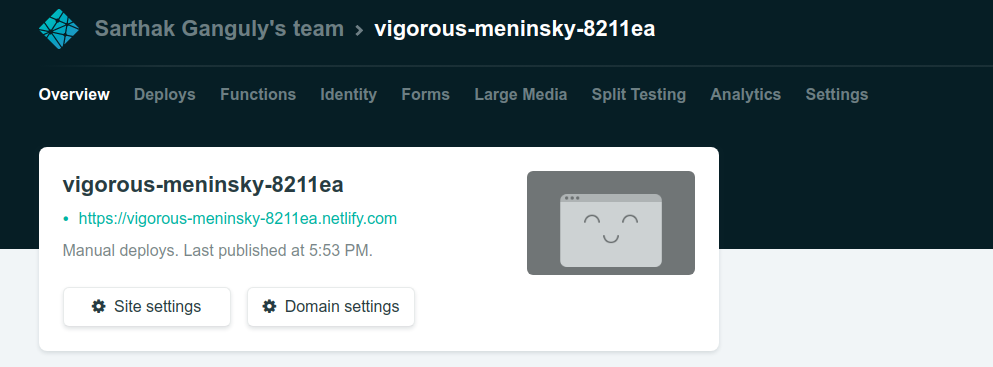
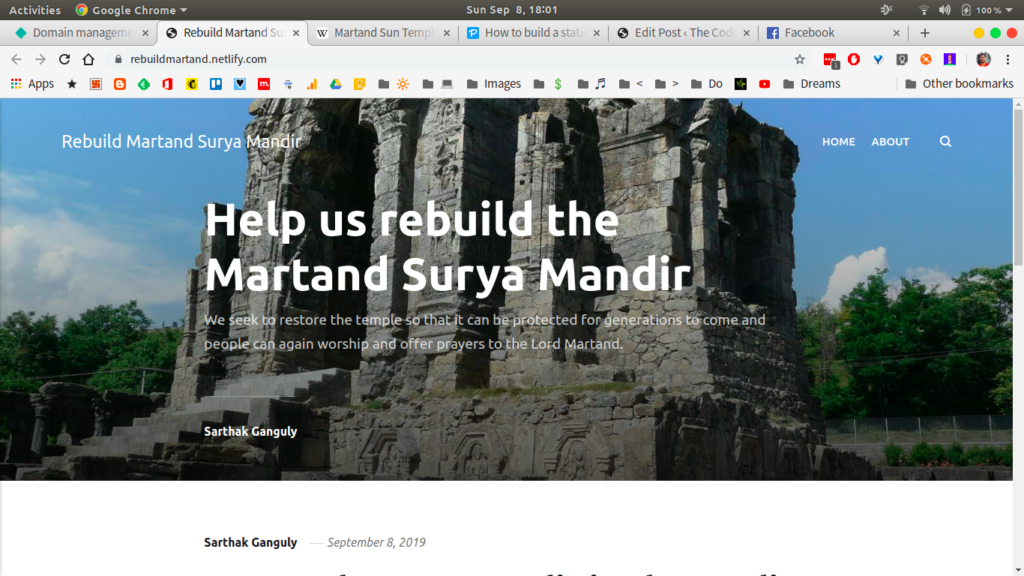
Just upload this to Netlify.
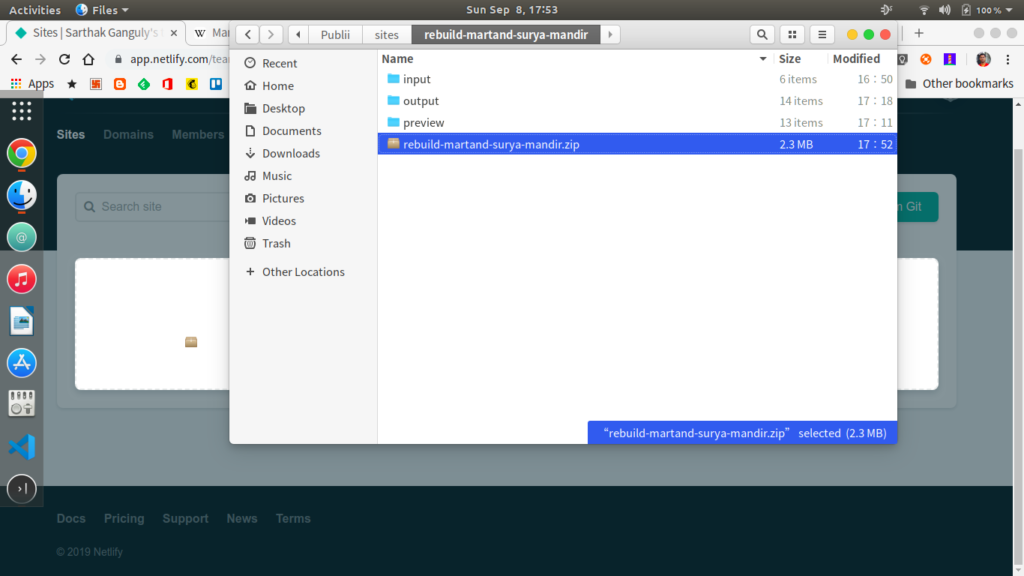
It is not over yet.
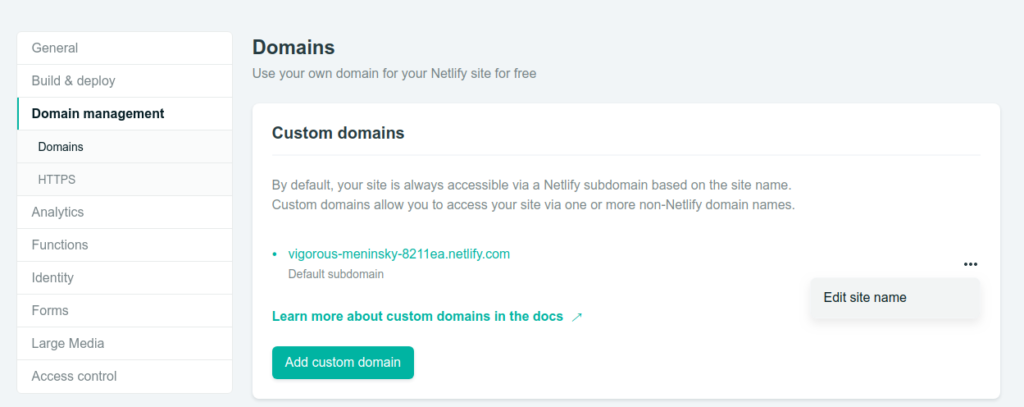
You will need to change the URL otherwise it won’t look okay.
For other hosts, you may need to unzip and transfer the contents to the public http root. You can get the guides to hosting for each of the hosting services by a simple Google search.
Who this may not appeal to
Seasoned developers who have very specific web design requirements in mind. The limited theme support may break your resolve to use Publii.
Sure, you can create themes, but the main reason you will choose Publii is to save time in the first place. If customisation is your primary requirement – and if the built in themes and features don’t cover you – building a fresh one using hugo may be better.
Conclusion
The only reason I will stick with WordPress for now is because I am so used to it and the trouble of migrating the entire site to a static setup is easier said than done.
But for those of you who are yet to start with a database enabled website or using a full featured Content Management System – do give Jekyll, hugo and Publii a try.
I found Publii remarkably easy to use and if building functional websites that you can manage easily is a priority – you should go this way as well.
Hugo, in my opinion, is a bit more customisation friendly. But the time it will take to truly tweak it properly may not be worth the effort. You are probably better off with Jekyll and its millions of themes and community support.
The fun part while writing this guide to build static websites in the shortest period of time was when I realised that you can actually roll out websites – with their site stucture in less than a minute.
But there are pros and cons with each approach.
Which one are you going to try out first? Please share and do let me know.
